
Saturday, 18 February 2017
Five Top Tips for a Quiet Classroom
Five Top Tips for a Quiet Classroom
1) MODEL MODEL MODEL!
It was not until a few years into my teaching career that I came across the concept of modelling, but I am so glad I did! It really works. You may be telling your students over and over to ‘work quietly’ or to use ‘inside voices’, but do they really understand what you mean? At the beginning of the year, or whenever they need a recap, show your students exactly what you mean. Run through each voice level expectation (silent, whisper, table talk etc) and demonstrate them to your class. Gather your class and tell them that you are going to demonstrate a voice level expectation. Tell them that you are going to show them ‘silent working’, for example. Pretend you are a student, walk to fetch your work, sit down at a student’s place and begin working silently, eyes on the work, not looking around etc. After your demonstration ask your students what you were doing, not just with your voice, but with your whole body, i.e. were you looking around at other children or were your eyes firmly on your work? After your discussion, ask a volunteer student to demonstrate to the rest of the class. I then usually get a small group to demonstrate before getting the whole class to try it together. Repeat this for however many voice levels you will be using within your classroom to ensure that your students really do know what your expectations are.
It was not until a few years into my teaching career that I came across the concept of modelling, but I am so glad I did! It really works. You may be telling your students over and over to ‘work quietly’ or to use ‘inside voices’, but do they really understand what you mean? At the beginning of the year, or whenever they need a recap, show your students exactly what you mean. Run through each voice level expectation (silent, whisper, table talk etc) and demonstrate them to your class. Gather your class and tell them that you are going to demonstrate a voice level expectation. Tell them that you are going to show them ‘silent working’, for example. Pretend you are a student, walk to fetch your work, sit down at a student’s place and begin working silently, eyes on the work, not looking around etc. After your demonstration ask your students what you were doing, not just with your voice, but with your whole body, i.e. were you looking around at other children or were your eyes firmly on your work? After your discussion, ask a volunteer student to demonstrate to the rest of the class. I then usually get a small group to demonstrate before getting the whole class to try it together. Repeat this for however many voice levels you will be using within your classroom to ensure that your students really do know what your expectations are.
2) Play quiet music in the background
I find this particularly useful during silent work. I usually play classical music, meditation music or natural sounds, i.e. waves breaking, rain, jungle noises etc. I find that this calms the class and keeps them focused. Try out different types of music with your class and see what works best.
I find this particularly useful during silent work. I usually play classical music, meditation music or natural sounds, i.e. waves breaking, rain, jungle noises etc. I find that this calms the class and keeps them focused. Try out different types of music with your class and see what works best.
3) Have a noise monitor on each table
Give a student on each group the responsibility of reminding others to stick to the voice level. The noise monitors will enjoy the responsibility and it will put the responsibility back on the children. When I have used this technique in the past, at the end of the day I awarded the table a who had been the quietest by placing a soft toy on that table the next day for extra motivation stick to the voice level!
Give a student on each group the responsibility of reminding others to stick to the voice level. The noise monitors will enjoy the responsibility and it will put the responsibility back on the children. When I have used this technique in the past, at the end of the day I awarded the table a who had been the quietest by placing a soft toy on that table the next day for extra motivation stick to the voice level!
4) Quiet Critters
When your class are working silently get out the Quiet Critters! These are simply little pom pom type toys/creatures that I place around the room, or on a shelf when my class are working silently. I tell my class that they do not like noise and only come out when they are working silently. If your class start to talk, put them away. Your class will try extra hard to stay silent so they can see the Quiet Critters come out and stay out!
When your class are working silently get out the Quiet Critters! These are simply little pom pom type toys/creatures that I place around the room, or on a shelf when my class are working silently. I tell my class that they do not like noise and only come out when they are working silently. If your class start to talk, put them away. Your class will try extra hard to stay silent so they can see the Quiet Critters come out and stay out!
5) Noise Traffic Lights
When your students are working at the voice level expected display a green traffic light symbol. This could simply be a green circle stuck onto black card. This lets the children know that are working at expectation. If they begin to talk/ get too noisy change the green traffic light to an amber one. Give the children one minute to get back to the expected noise level, in which case you change the traffic light back to green. If however, they do not quieten down, change the traffic light to red. Agree beforehand with the children what the green and red traffic signals mean in terms of consequences and rewards. Red may mean one minute knocked off free time/recess/break time etc. The children could work to stay on green by the end of 10 lessons which could mean an extra 5 minutes of free time/recess/break. This idea could be a lot of work for the teacher in terms of changing traffic light colours but for a particular noisy class it can be great to get them working together for an end goal.
When your students are working at the voice level expected display a green traffic light symbol. This could simply be a green circle stuck onto black card. This lets the children know that are working at expectation. If they begin to talk/ get too noisy change the green traffic light to an amber one. Give the children one minute to get back to the expected noise level, in which case you change the traffic light back to green. If however, they do not quieten down, change the traffic light to red. Agree beforehand with the children what the green and red traffic signals mean in terms of consequences and rewards. Red may mean one minute knocked off free time/recess/break time etc. The children could work to stay on green by the end of 10 lessons which could mean an extra 5 minutes of free time/recess/break. This idea could be a lot of work for the teacher in terms of changing traffic light colours but for a particular noisy class it can be great to get them working together for an end goal.
10 ways to relax this summer for teachers
10 ways to relax this summer for teachers
Read a Book
Remember that book you’ve been meaning to pick up all year but you’ve been too busy to find time? Well, now’s the perfect opportunity! It’s time to grab your book and get lost in the story.
Film Night
Grab some nibbles and your duvet and get comfy on the sofa while you enjoy your favourite film! Invite friends over, or simply enjoy by yourself!
Pamper Yourself
You don’t need to book into an expensive spa to rejuvenate yourself. Run a bubble bath and unwind whilst you treat yourself to a DIY facial and manicure. You’ll feel better after a bit of pampering!
Go for a Walk
Get outside in the fresh air and enjoy nature as you explore your local area. It’s great exercise and a great way to lower your stress levels too.
Meditate or try some Yoga
I joined a local yoga class at the beginning of the year and it is a fantastic way to clear your mind, forget about school and de-stress. It really does make you feel calmer and more relaxed.
Gardening
Like taking a walk, being outside with nature will help you to feel relaxed and calm. If you don’t have a garden, you could make a window box with your favourite plants. Just having greenery around will help you feel chilled out!
Learn a New Skill
Whether it’s learning a new language, taking an art class or joining that dance class you’ve been meaning to go to all year, summer is the perfect time to try something new. You might even be surprised to find that your new skill comes in useful in your teaching practice.
Get Away
You don’t need to book a holiday to get away from it all. Heading out to a local beauty spot, historic house or the coast (if you’re lucky enough to live nearby) are all great ways to rejuvenate yourself in new surroundings.
Crafting
Get creative and try something crafty! Whether it’s drawing, knitting, sewing or scrap booking, these are all great ways to clear your mind and solely focus on the task in hand. It’s also extremely satisfying to complete a project and see your finished drawing, knitted hat or scrap book page in front of you – not a feeling many of us get to experience in our everyday jobs, as there’s always something else that needs doing in teaching!
Create a Good Memory Book
I know I said forget about school, but I’ll make one exception for my final tip! Write down some of your happy, positive moments from the school year in a memory book. Record that time a struggling child ‘got’ that tricky multiplication method or when a child in your class was inspired to write their own story at home in their own time after your lesson that day etc. Add in thank you notes from students and parents. It’s great to look back over it and remind yourself why you do what you do!
Top Tips for New Teachers
Top Tips for New Teachers
1. Be Consistent
Establish your classroom management system and be consistent when implementing it. Giving students a secure, stable environment where they know where they stand and what to expect will save you and your students a lot of frustration in the long term. Children learn best when they feel safe and secure and having a consistent classroom management system is key. So establish it, implement it and make sure you follow through with it!
2. Just say no
Do not feel guilty about saying no to extra responsibilities. As a new teacher (and an experienced one!) there are so many things to learn in terms of managing your class, planning lesson, assessments, parent communication and so on and these can often seem daunting on their own, never mind taking on extra roles. Do not be afraid to say no to running that after school club or organising that science week. If you feel ready to take it on, then go ahead, but do not feel pressurised into going above and beyond. You are a new teacher and learning how to manage your class is your number one responsibility.
3. Use your planning time effectively
Try to get as much of your work done in school as you can. Before your planning time starts know what it is that you want to achieve. This could be getting next week’s planning done, making copies, marking a set of books etc. Try not to get distracted and stay focused on your task. Try to find a quiet place to work (not always easy in a school, I know!). Try to have all your resources ready, i.e. planning templates, worksheets to print out on a storage device etc. so you are ready to go. This time is yours, so make the most of it!
4. Don’t struggle alone
Find a trusted mentor and ask them for advice if you need to. If you are struggling with a particular child or you are looking for ideas about how to teach a particular tricky concept, don’t be afraid to ask for help. While googling is great for this too, it doesn’t beat talking through ideas face to face. Find someone you trust and don’t be afraid to ask. In the UK you should have an assigned mentor during your first year and this is what they are for!
5. Learn to draw a line under your work
It took me a few years to accept that there will always be something else to do when it comes to teaching, but it’s fine if I don’t manage to do it all! Teaching is a practice where there are many ways of doing things and there is always something else you can do to improve, but the quicker you learn to accept this and be ok with it, the better. Your students would much rather have a refreshed teacher who is well rested than a tired, frazzled teacher who has been up all night planning and replanning a lesson because there was ‘something else that could be done’. Learn to draw cut off points and stick to them.
6. Go to staffroom at lunch
You need a break away from the classroom during the school day. Make sure you make time during lunch to spend in the staffroom. Get to know your colleagues and spend time with them. You will feel ready for the afternoon session after a decent lunch break!
7. Go with the flow
I used to get frustrated when that lesson I’d carefully planned was interrupted by a surprise visitor or an extra singing practice for the school concert. Learn to accept that this is school and things often don’t run as expected. So don’t worry and just pick up where you left off tomorrow. At least all your prep will be done!
8. Make time for yourself
As much as you can, try to leave school work at school – where it belongs! You need to make time for yourself and be able to relax and spend time with your friends and family. This can be harder than it sounds (see point 5), but it is important to step away from work and make time for yourself so you are refreshed when you step back into the classroom. Make sure that you make time for your own hobbies and interests away from school.
10 Classroom Procedures that Will Save Your Sanity
10 Classroom Procedures that Will Save Your Sanity
The difference between a good procedure and a bad procedure is the difference between “everything is running fairly smoothly” and “this is driving me nuts. I’m gonna’ pull my hair out.”
Sometimes it’s easy to think of a procedure, and other times, a question will have us stumped for years.
Take pencils for example.
They’re these little lead things, y’know. They shouldn’t cause so much trouble.
But I’ve spent years trying to figure out how to keep my kids supplied with pencils. There just seemed to literally be no simple solution.
Until I finally heard an idea this summer that just might work! (more on that in a sec….)

So with school starting soon and procedures on everyone’s mind, I thought I’d share a few procedures that have worked well for me – and a couple awesome ideas I’ve run across since I’ve stepped out of the classroom (like that pencil thing….)
10 Classroom Procedures that Will Make Things Run More Smoothly
- Tell kids they can’t use the restroom. Okay, I know that sounds crazy, but hear me out. When kids ask to use the restroom during instructional time, my typical answer is, “no not right now.” Sometimes I follow this by telling them a time they can go, telling them I’ll let them leave class a minute early, or telling them I’ll write them a pass to have a couple extra minutes to go between classes, but the gist of the answer is “not right now.” The thing about saying no right away is that if the student really has to go, they’ll ask again (more urgently) in a few minutes. At which point you go ahead and say yes.
- Use short phrases like “prepare for a quiz” that stand for a combined set of directions. I teach my students that when I say “Prepare for a quiz” they are to clear their desk of everything except a pencil and a clean sheet of paper to use as a cover sheet. They are also to have a pen handy to grade. At first this takes a lot of instruction, but later in the year all I have to say is “prepare for a quiz,” and the rest happens (somewhat) automatically.
- Use call-and-response sayings to get your class’s attention. Basically you teach your students to respond when you call out something. So, for example, you say “All set?” and your students respond with “You bet!” This is infinitely better than just asking your students to be quiet because when they respond “You bet!” they actively stop what they are doing & refocus on you. I wish so much I had known about these when I was teaching – it would’ve prevented so much frustration! (, or for more info check out Whole Brain Teaching.)
- Teach your students to use question marks when grading in class. When your students are grading work in class, don’t take grading questions. You just don’t have time for a million versions of “is it okay if Jerry didn’t capitalize the first letter?” Instead, teach your students to put a question mark by any question they’re not sure is correct. Then look at the question marks when you record the grades.
- Go over tests at the end of the class period. If you try to go over a test at the start of class, you’ll never know how long you’ll spend on it or how many arguments you’ll get about why such-and-such answer really should be fine. Instead, if you want to spend 10 minutes going over a test, stop class 10 minutes early to go over it. That way, you are pretty much guaranteed to only spend 10 minutes, and if anyone has serious questions they can stay after class to ask them.
- Have students pass their papers backwards or sideways. This may not seem like a big deal, but if you have your students pass their papers forward, they can’t see them coming. So Brandon has to poke Celeste 5 times with the stack of papers or ends up banging her over the head. Instead, have your students pass their papers over and/or backwards so they can see them coming their way. Oh, and if you train the last student who ends up with the papers to paperclip them and put them in a designated spot, that’s one less thing for you to worry about.
- Have designated in bins. Simple enough, but so many teachers don’t do this. Have a spot for that last student to put the stack of papers. And for students to turn in late work or work from when they were absent.
- Have students pass back papers for you. Now I’m not talking about tests or anything confidential, but if your classroom’s anything like mine, there are plenty of papers that need to be passed back that students can definitely help with. I create an “out” bin for each of my classes. Then I have one student per class (they normally take a turn for a month or two) who is trained to grab whatever’s in the out bin and pass them out at the start of class.
- Have an absent secretary. Designate a student to write down what you do in class each day and what the homework is. Keep this list in a special folder so that absent students (or their parents) can easily find what they missed when they return. Here’s an example of the form I used.
- Purchase & give out golf pencils. Okay, so I just heard about this idea this summer in our Create Your Dream Classroom summer book club, but it sure sounds like it’s worth a try. You know that impossible pencil situation? Buy a couple boxes of golf pencils (like these) and hand them out when your students don’t have a pencil. They are so many (& they’re cheap enough) that it doesn’t matter whether or not you get them back. And since students don’t like that they’re so small and have no erasers, they’re more motivated to bring their own. Sounds ingenious to me (insert evil laugh).


Member countries of EEC
Members
The six states that founded the EEC and the other two Communities were known as the "inner six" (the "outer seven" were those countries who formed the European Free Trade Association). The six were France, West Germany, Italy and the three Benelux countries: Belgium, the Netherlands and Luxembourg. The first enlargement was in 1973, with the accession of Denmark, Ireland and the United Kingdom. Greece, Spain and Portugal joined in the 1980s. The former East Germany became part of the EEC upon German reunification in 1990. Following the creation of the EU in 1993, it has enlarged to include an additional sixteen countries by 2013.

| Flag | State | Accession | Language(s) | Currency | Population (1990)[17] |
|---|---|---|---|---|---|
| Belgium | 25 March 1957 | Dutch, French and German | Belgian franc[18] | 10,016,000 | |
| France | 25 March 1957 | French | French franc | 56,718,000 | |
| West Germany/Germany[note 1] | 25 March 1957 | German | German mark | 63,254,000[19] | |
| Italy | 25 March 1957 | Italian | Italian lira | 56,762,700 | |
| Luxembourg | 25 March 1957 | French, German and Luxembourgish | Luxembourgish franc[18] | 384,400 | |
| Netherlands | 25 March 1957 | Dutch | Dutch guilder | 14,892,300 | |
| Denmark | 1 January 1973 | Danish | Danish krone | 5,146,500 | |
| Ireland | 1 January 1973 | Irish and English | Irish pound | 3,521,000 | |
| United Kingdom[20] | 1 January 1973 | English | Pound sterling | 57,681,000 | |
| Greece | 1 January 1981 | Greek | Greek drachma | 10,120,000 | |
| Portugal | 1 January 1986 | Portuguese | Portuguese escudo | 9,862,500 | |
| Spain | 1 January 1986 | Spanish[note 2] | Spanish peseta | 38,993,800 |
Member states are represented in some form in each institution. The Council is also composed of one national minister who represents their national government. Each state also has a right to one European Commissioner each, although in the European Commission they are not supposed to represent their national interest but that of the Community. Prior to 2004, the larger members (France, Germany, Italy and the United Kingdom) have had two Commissioners. In the European Parliament, members are allocated a set number seats related to their population, however these (since 1979) have been directly elected and they sit according to political allegiance, not national origin. Most other institutions, including the European Court of Justice, have some form of national division of its members.
The Bill of Rights
The Bill Of Rights
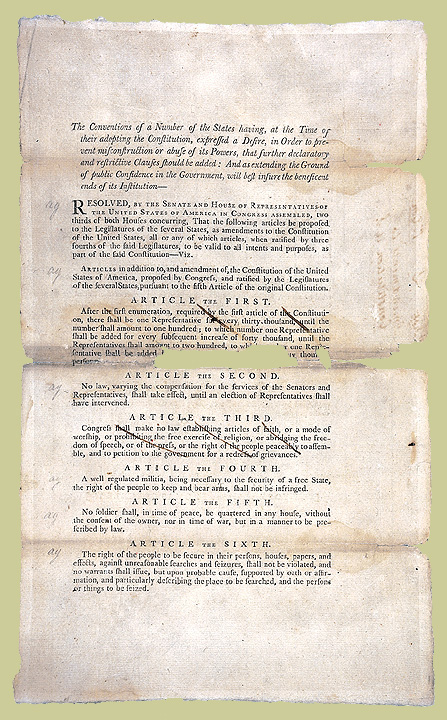
The Bill of Rights are the first 10 amendments of the Constitution of the United States. They were adopted all at the same time. They were added to the Constitution before the states would approve the Constitution. Since that time, other amendments have been added, but these were the first 10.
1st: Prohibits the making of any law respecting an establishment of religion, impeding the free exercise of religion, abridging the freedom of speech, infringing on the freedom of the press, interfering with the right to peacefully assemble or prohibiting the petitioning for a governmental redress of grievances
2nd: Protects the right to keep and bear arms
3rd: Places restrictions on the quartering of soldiers in private homes without the owner's consent, prohibiting it during peacetime.
4th: Prohibits unreasonable searches and seizures and sets out requirements for search warrants based on probable cause as determined by a neutral judge or magistrate.
5th: Sets out rules for indictment by grand jury and eminent domain, protects the right to due process, and prohibits self-incrimination and double jeoparty
6th: Protects the right to a fair and speedy public trial by jury, including the rights to be notified of the accusations, to confront the accuser, to obtain witnesses, and to retain counsel
7th: Provides for the right to trial by jury in certain civil cases, according to common law
8th: Prohibits excessive fines and excessive bail, as well as cruel and unusual punishment
9th: Protects rights not enumerated in the Constitution.
10th: Reinforces the principle of federalism by stating the federal government possesses only those powers delegated to it by the states or the people through the Constitution.


HOW TO STRUCTURE A 60 MINUTE CLASS PERIOD
HOW TO STRUCTURE A 60 MINUTE CLASS PERIOD
How long are your class periods? This year I had 75 minute class periods. It was glorious! In prior years, I have had 50, 60, 75, and 100 minute class periods. 50 felt like a race against the clock every day; 100 minutes was long enough to watch every students’ eyes glaze over in boredom. My proverbial Goldilocks situation leads me to the belief that anywhere between 60-75 minutes is perfect. Today, I am going to go over how I would structure a 60 minute class period.
HOW TO STRUCTURE A 60 MINUTE CLASS PERIOD
These of course are guidelines; sometimes albeit often, in a middle school classroom, things do not go according to plan, but it is always a good idea to have a structured routine for both yourself and your students.

WARM UP: 5 – 10 MINUTES
You might also refer to this as the “do first” or “bell ringer”, either way they all set the stage for a productive class period. One thing that I gained from reading The First Days of School is to communicate to students that the bell, nor does the teacher start the class, but YOU (the student) starts class. Students come in, write down their homework, get out listed materials, and begin their warm up. (You can see how I remind students of this routine here.) This is the time where I check in with the previous day’s absent students, check to make sure homework is complete, and take attendance all while students are silently working.
The warm up has to be something that 80% of students can complete 80% of the assignment without any help. A huge frustration for teachers and students is if a warm up is too challenging or has complicated directions. The important part of the warm up is that students get straight to work. For the first 4 weeks of the school year, I stick to multiplication and division facts. I put a timer on when the bell rings for 5 minutes and project it. When the timer goes off, I spend the next 3-5 minutes either going over the warm up, going over last night’s homework, or a combination of both.
HOOK: 2 MINUTES
This is the time I use to invest students in what they are learning that day. If the objective is solving for rates, I might show a video of Usain Bolt running the 100 meter dash, and tell students that by the end of class, we will be able to calculate his speed. Sometimes I am not as fancy, and I have students turn and talk to their neighbor about what we learned yesterday or review the vocabulary introduced within the unit.
GUIDED NOTES: 10 – 15 MINUTES
My mentor teacher use to always reference the concept of movement and keeping things changing for students, likely after sitting through a rough lesson during my first year. The rule of thumb is that notes should not take longer than 1 plus your students’ age, so if you teach 12 year olds, notes should last no longer than 13 minutes (12+1). Students are only capable of active listening for so long. And by students, I mean everyone.
The rule of thumb is that notes should not take longer than 1 plus your students’ age, so if you teach 12 year olds, notes should last no longer than 13 minutes (12+1). Students are only capable of active listening for so long. And by students, I mean everyone.
I spend about 2 minutes teaching any vocabulary that they will need for that day. I model a ‘think aloud’ on a easy level problem under my document camera. Then I use another easy problem, but ask students guiding questions, (checks for understanding) so they are the ones solving the problem. These two easy problems take around 5 minutes. Depending on the concept, we then solve medium/difficult problems in the same manner. At this point, I am asking questions, giving adequate wait time, and moving around the room to see specific students work. Sometimes, I use a number cube to call on students to ensure they are mastering the skill with less and less help from me. Other times, I have them check with their table, discuss, and share with the class. By moving around and cold calling on students, I am able to determine who needs to be in my small group. Ideally, this takes 5-8 minutes.
If time allows, I love to incorporate a more difficult question that I would expect only about three quarters of my students to be able to solve without my help. I ask my students to try to solve it on their own. While students are solving, I use this time to pass out the activity or classwork. When I am passing out the classwork, I take a peek at how students are doing and decide whether we should go over the problem.
CLASS ACTIVITY: 20 MINUTES
This is the time period where students are engaging with the work in pairs or at their tables. This is also when I am pulling small groups. Before I pull small groups though, I typically circulate to ensure that everyone has started, answer clarifying questions, and I give rewards to students who are showing strategies and working hard. If an activity seems more difficult or like students need more assistance, I might forgo small groups or form a small group to work together and stick nearby.
The classwork could be a card sort, matching activity, scavenger hunt, white board practice, a game, or station work. My favorite activities are when students complete math problems to solve a riddle. This time period has been made increasingly less challenging for me by giving students a mixed answer key. Students solve a problem, and can find their answer among a list of 10 other answers which eliminates students raising their hands just to ask “did I get it right?” Students can see that they solved the problem correctly because they got an answer provided. This doesn’t have to be on their worksheet or in a riddle, you could write 10 answers mixed up on the board.
What is important here is that you have more work than what can get done in the time period or you have an extension activity that students know where and how to get. I used to get so frustrated when I was trying to work with struggling students, and I had fast workers who were finished and now either asking me what they should be doing or distracting those who had not yet finished.
***If you have a 45-50 minute class, this is the time where it gets a little sticky. Between cleaning up and closing, it might be difficult to assign independent practice. When I had 50 minutes, I always aimed to have students work on the homework for at least 5 minutes. This gave them a good start, aka more likely to finish, and I was able to answer questions and make sure everyone was on the right track.
INDEPENDENT PRACTICE/EXIT TICKET: 15 MINUTES
The goal is that by the end of class, all of my students can practice the skill without any support from me or their teammates. I want students to be able to use what they already know to think critically and PRESERVE independently. This is the work that I will check or grade as a formative assessment and decide whether I need to go over this skill again. At this time, my small groups are still working with me, but I have scaffolded, so that I am only stopping them if I see something being practiced incorrectly. During this time, I do allow students to reference their notes.
CLOSING: 1 MINUTE
During this time, I ask for exit tickets to be stacked in a neat pile at their table, and I dismiss tables according to who is packed up and ready to go. I like to have students refer to the objective and summarize their learning in a couple of sentences, too. If we are running ahead of schedule, we might complete a quick trade and grade, so students can receive immediate feedback and save me time grading.
I got tired just thinking about these classes! They go so quickly and then you turn around and do it again and again. How long are your classes? How do you spend your time?


Friday, 17 February 2017
HOW TO GET YOUR STUDENTS EXCITED ABOUT “BORING” READING
HOW TO GET YOUR STUDENTS EXCITED ABOUT “BORING” READING

Have you ever heard that dreaded groan when reading a difficult text? Or do your kids space out and wait for someone else to answer the question? Are they reluctant to search for evidence and find responses? My kids used to do that too, but I’ve found a way to hook them at the beginning of the week. This hook lasts throughout the week and it doesn’t matter if I assign difficult reading or “boring” stories.
The secret lies in our Guiding Question.
Every week, I am required to submit lesson plans. I also read other teachers’ lesson plans and provide feedback. Here is what many do: Objective: I can craft a thesis that answers the question, provides evidence, and is structured appropriately. Guiding Question: How can I craft a thesis that answers the question, provides evidence, and is structured appropriately?
Do you see how that is not effective? It does nothing to further your class engagement.
Now, what if you used your guiding question as a way to intrigue your kids? Perhaps you want your guiding question to spark debate. Guiding questions really can be the gateway to student-centered learning and an immediate buy-in for whatever texts you are going to ask your students to read.
As engaging as I might find a text, my students are rarely excited to read a challenging text, unless I have crafted a well-written Guiding Question. Check out the example below:
Guiding Question:
What is the difference between love and infatuation?
Texts:
Narcissus and Echo (Fiction)
The Pros and Cons of Arranged Marriage (Non-Fiction)
“The Raven” by Edgar Allan Poe (Poetry)
Guiding Question:
How might my choices affect my future?
Texts:
Romeo and Juliet (Fiction)
“The Impact of Fossil Fuels” (Non-Fiction)
“The Road Not Taken” by Robert Frost (Poetry)
Guiding Question:
What is the most important journey that one can take in life?
Texts:
The Odyssey (Fiction)
“A Bee’s Journey from Hive to Pollen to Hive” (Non-Fiction)
“The Journey” by Mary Oliver (Poetry)
Many teachers struggle to teach fiction and nonfiction simultaneously, but with a well-written Guiding Question, it becomes easier to spot the connection that can tie a piece together.
Here is what makes a good Guiding Question:
-Open-ended: There can’t be just one right answer.
-Relevant: Can the students see the connection to their own life?
-Multi-faceted: Are there several layers to this question? Can the discussion go in multiple ways?
-Polarizing: If everyone in your class will have the same answer, the engagement will die quickly. Teach your students to respect each other’s beliefs and you will be teaching them a real-world skill.
But…I can’t just write an intriguing Guiding Question and then forget it throughout the week. My students have to know that they are going to be given opportunities to discuss, debate, write, and share. This is key if I want my students to be engaged. The students don’t really care what I think about these topics, but they do care what their peers think. I write our Guiding Question in large letters on the whiteboard and then introduce them to it right after greeting them on Monday morning. After introducing the Guiding Question, then I move on to objectives.
Here are some of my favorite ways to get kids talking:
Pop-Up Debates via DaveStuartJr. If you haven’t read about this technique, check it out.
Gallery Walks
Allowing students to record thoughts on our class whiteboards.
Partner talk
Quick writes
Tweet it (write short thoughts and stick them to the wall)
Silent Debate (students write their thoughts and then pass their paper to the next person. Then students respond to the paper in front of them and then pass it on. Continue this until the student has their original paper or time is up.)
Socratic Seminars
I hope you have found this helpful. It really works wonders to find that common thread that you can pull in order to allow your students to see how seemingly very different texts can have common themes and similarities. This will work wonders in preparing students to synthesize information from multiple texts.
Subscribe to:
Posts (Atom)